NovaMynd
Studio User Manual
Welcome to the User Manual for NovaMynd.
These user manuals will explain how to use both the NovaMynd portal and app, along with all their features. Whether you’re a new user or need a quick refresher, this guide provides step-by-step instructions, helpful tips, and troubleshooting support to ensure a smooth and efficient experience.
Subscribe & Register
Once you’ve subscribed or joined, you’ll receive a confirmation email with instructions on how to register.
Follow the steps in the email and submit the registration form.
You will then receive another email with your login credentials and a link to verify your account.
After verification, you can log in to the NovaMynd apps and begin your journey.
Select a platform:

NovaMynd Studio Portal
The NovaMynd portal is your all-in-one content management hub. Easily create media using built-in tools or upload your own. Build personalized training protocols, manage clients, and track their progress—all through an intuitive, user-friendly interface designed to streamline your sound healing practice.
NovaMynd Studio App
The NovaMynd app makes daily use effortless—whether you’re delivering sessions, tracking client progress, or managing users. With intuitive access to training and monitoring, it’s the perfect tool to keep your practice flowing smoothly, wherever you are.
1
Accessing the NovaMynd Portal
The NovaMynd Portal is a web app. Once you’ve received your account credentials and verified your account, visit the NovaMynd website on your preferred browser and click Sign In.
- Follow the on-screen instructions to install the portal on your device. This will save it for easier access anytime.
- Once the portal is installed as an app, open it and log in using your credentials.
2
Media Library & Tools Management
Start by creating your own media using NovaMynd’s built-in tools, or upload existing content from your device.
Click on the Media Library tab to access all the media saved to your library. From here, you can:
-
Create, upload, edit, or delete media at any time
-
Filter and search your content for quick access, with support for bulk actions such as deleting multiple items or importing them directly into tools and functions
-
Launch any of our built-in tools directly
Below, you’ll find detailed information about each available tool and how to use them effectively.
Please note that some tools may require token deductions.
Audio Composer
The Audio Composer allows you to create custom audio tracks by selecting files from your Media Library. You can easily:
-
Trim audio clips
-
Apply fade-in and fade-out effects
-
Adjust volume levels
-
Mix multiple audio files to generate personalized soundtracks
Key Features:
-
You can set 1 track as the Master track, which starts at the beginning and ends at your specified point.
-
You may add up to 4 overlay tracks. Each overlay begins at a custom start time you define in the settings, in sync with the master track.
This tool is ideal for combining music, voiceovers, sound effects, and more into a single, cohesive audio experience.
Binaural Beats Tools
The Binaural Beats Tool is available in two versions; Advanced and Personalized -designed to suit different user needs and experience levels.
1. Advanced Binaural Beat Generator
This version is designed for users experienced in brainwave entrainment who want full control over the customization process. It allows you to:
-
Select predefined brainwave states and Solfeggio frequencies
-
Customize transitions (up to 4 can be added)
-
Set precise durations for each section
Ideal for fine-tuning your brainwave experience for purposes like focus, meditation, sleep, or creativity.
2. Personalized Binaural Beat Generator
This beginner-friendly version is perfect for those new to binaural beats. It guides you through a structured, question-based process to create a custom binaural beat tailored to your goals. Simply:
-
Answer a short questionnaire
-
Get a personalized audio program based on your responses
Whether you’re looking for relaxation, focus, or deep meditation, this tool makes it easy to generate an effective, goal-oriented binaural beat track.
Text-to-Speech (TTS) Tools
The Text-to-Speech (TTS) Tool is available in two versions; Custom Text and AI Meditation Assistant – designed to suit different content creation needs.
1. Custom Text
The Custom Text tool is perfect for users who want to transform their own scripts or written content into smooth, natural-sounding speech.
Key features include:
-
Enter and convert your custom script into audio
-
Use pause tags to control rhythm and pacing, with adjustable durations
-
Import and edit existing submitted scripts
-
Choose from multiple English accents (e.g., US, UK)
-
Select from various male or female voices
This tool is ideal for creating engaging narrations, meditations, or voiceovers.
2. AI Meditation Assistant
The AI Meditation Assistant helps you generate personalized guided meditation scripts with minimal effort. Just enter your goal, and the assistant will craft a tailored script for you.
Key Features include:
-
Personalize the script by adding the listener’s name, which will be included periodically throughout the narration
-
Edit and refine the generated script before converting it to audio
-
Automatic pause breaks are added after each sentence (fully adjustable)
-
Choose from multiple English accents (e.g., US, UK)
-
Select from various male or female voices
This version is ideal for users who want a guided meditation without writing a script from scratch.
Upload Media
The Upload Media tool allows you to add your own content to your Media Library for easy access and future use across tools.
Key Features:
1. Upload Audio and Image Files
- Select files from your device or drag and drop them
- Provide a name, and adding a description is optional
- Files will be saved directly to your Media Library
2. Add YouTube Videos
- Paste the YouTube link, then provide a name. Adding a description is optional.
- The video will be added to your Media Library
This tool helps keep all your creative assets in one organized place, ready to be used across the NovaMynd platform.
3
Training Protocols Setup
Ensure you have already uploaded the media files you wish to use in your Media Library.
To create and manage training protocols, follow these steps.
Click on the Training Protocols tab to view your available protocols.
-
Smartpath Protocols: These are your personal protocols.
-
Community Protocols: Protocols shared within the NovaMynd community.
For each protocol, you can:
-
Create protocol
-
Edit or delete your protocols (Note: Community protocols cannot be edited or deleted).
-
Simulate the protocol.
-
Assign protocols to users and view users who are assigned.
Below, you’ll find detailed information about each option.
Create Protocol
To create a new protocol, click on + New Protocol.
1. Overview Section (Required)
- Protocol Name: Give your protocol a name.
- Description: Provide a brief description of the protocol.
- Cover Photo: Select a cover photo from your Media Library or generate one using the AI Image Generation tool. (Note: AI image generation may deduct tokens).
2. Mainstream Section (Required)
The Mainstream section defines the main media used in the protocol. This media will play at the start of the training, right after the optional calibration.
- Media File: Browse and select your media file (either video or audio) from your Media Library. If using a video, you can choose to mute it if you only want the visual presentation.
- End Conditions: Decide whether the mainstream media should stop at the end of the media or at a specified second.
To access the optional sections, click on the Advanced Settings button.
3. Calibration Section (Optional)
The Calibration section plays media at the beginning of the training (helping establish the starting conditions), followed by the mainstream media.
- Media File: Browse and select your media file (either video or audio). If using a video, you can choose to mute it if you only want the visual presentation.
- Duration: Define how long this media should play.
4. Overlay Section (Optional)
The Overlay section defines media that can either overlay or replace the mainstream media during training.
- Media File: Select your media file (either video or audio). If using a video, you can choose to mute it if you only want the visual presentation. Note: Either the mainstream or the overlay media can be a video.
- Overlay or Replace: Select whether you want to overlay the media with the mainstream or replace it.
-
Overlay with Mainstream Media: If you choose to overlay, the overlay media will play alongside the mainstream media once the event condition is met. Additionally, you can set the overlay to repeat; once it stops as defined, it will start playing again until the mainstream media ends.
-
Replace Mainstream Media: If you choose to replace the mainstream media, the mainstream media will pause and the overlay media is played. The repeat option is not available in this case. Once the overlay finishes as defined, the mainstream media will resume.
-
- Event Settings: Define when the overlay media should trigger by selecting the event type (e.g., mainstream media time), the action (e.g., equals to), and the specific second at which the overlay will start. For example, if you set the event to “mainstream media time equals 60 seconds,” the overlay media will play as soon as the mainstream media reaches 60 seconds.
- End Conditions: Decide whether the overlay media should stop at the end of the media or at a specified second.
4. Settings Section (Optional)
The Settings section lets you customize additional options for your training protocol, such as:
-
Tips & instructions to be shown to users before starting the training.
Notes:
- The training is considered complete when the mainstream media stops, as defined in the settings.
- If the EEG License is activated for your account, additional settings will be available for EEG Neurofeedback. Otherwise, these options will appear as disabled.
Simulate Protocol
You can simulate the training protocol to preview how it will look and feel when your users run it.
Click on the Simulator icon ![]() , this will redirect you to a new page with an overview of the protocol.
, this will redirect you to a new page with an overview of the protocol.
Click on Start Training Simulation to begin. The protocol will then run as if a user is executing it, allowing you to experience it firsthand.
If the selected protocol is a Smartpath EEG Training Protocol, you can choose an existing training dataset for simulation, or use a default sample dataset.
View/ Edit / Delete Protocol
Edit Protocol: To make changes to an existing protocol, click on the Edit icon. You will be redirected to the edit page, where you can modify the protocol as needed and save the changes.
Note: If the protocol being edited is assigned to users, the new changes will take effect immediately.
Delete Protocol: To delete an existing protocol, click on the Delete icon. You will be prompted to confirm the deletion, as this action cannot be undone.
Note: Once a protocol is deleted, any users assigned to it will no longer have access to the protocol.
View More: By clicking on View More, you can access an overview of the protocol settings for further details.
Assign Protocol
Assign Protocol: To assign a protocol to one or more users, click on the ![]() icon to open the list of users. Select the desired users and click Assign to assign the protocol to them.
icon to open the list of users. Select the desired users and click Assign to assign the protocol to them.
View Assigned Users: To view the list of users assigned to a specific protocol, click on the ![]() icon. This will display the list of users.
icon. This will display the list of users.
If you wish to unassign the protocol from a particular user, click on their name. This will redirect you to the user profile, where you can find the protocol in the list and click Unlink Protocol.
Note: Ensure that user accounts have already been created. If you need help on how to create a user account, refer to the next section.
4
User Management
To create and manage user accounts, follow the steps below:
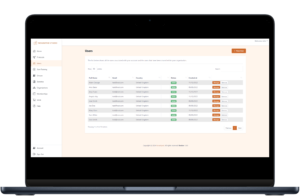
Click on the Users tab to view the list of all user accounts. From here, you can create, manage or remove user accounts.
Below, you’ll find detailed information about each option.
Create a User Account
To create a new user, click on + New User.
-
Complete the form with the required details.
-
Once submitted, a confirmation email is sent to the user.
-
The newly created user will appear in the users list and can now be managed.
Manage: Share Personal Access | Training Reports | Access Full Profile | Edit Profile
Click the Manage button next to a user to open their profile.
From here, you can perform the following actions:
1. Edit Profile
- Update the user’s profile information.
2. Assigned Protocols
- View the list of protocols currently assigned to the user.
- Unassign a protocol at any time by clicking Unlink Protocol.
3. Community Groups
-
If the user has been added to any community groups, you can view the list of those groups here.
4. Share NovaMynd Personal Access
-
If you want the user to use NovaMynd independently, click Share Personal Access.
-
This will generate personal login credentials, which are sent to the user via email. To help your clients use NovaMany effectively, share this User Manual which provides clear, step-by-step guidance.
-
To remove personal access, please contact support.
5. Access Training
From this section, you can access the Training Reports and the Training Data Management.
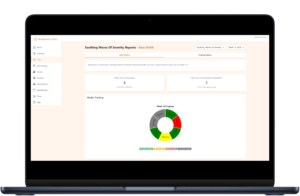
Training Reports:
-
Browse through different protocols and filter the reports by week to gain detailed insights.
-
Monitor user activity, including the number of sessions completed, usage patterns, and any feedback or ratings provided per session.
-
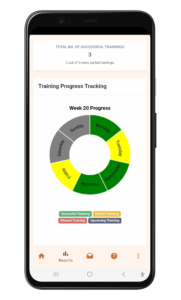
An overall progress overview is available once the user has completed at least 20 training sessions.
-
If the selected protocol is a Smartpath EEG Training Protocol, additional advanced statistics will be available.
Training Data Management:
- Access to training session data—available when the protocol is a Smartpath EEG Training Protocol.
- You can also download EEG data for any specific session directly from this section.
Remove a User Account
-
Click on the Remove button to delete a user account.
-
A confirmation prompt will appear. Once confirmed, the account will be permanently deactivated and no longer accessible.
-
To reactivate a user account, please contact support.
NovaMynd Portal - Users
NovaMynd Portal - Reports
5
Training Execution & Monitoring
NovaMynd gives you the flexibility to deliver training in ways that suit your workflow; whether in person at your practice or remotely through user self-access. In both cases, training sessions are tracked, rated, and monitored to provide deep insights into engagement and outcomes.
In-Person Training
You can guide users through their training either via the NovaMynd portal or the NovaMynd app:
1. Via the Portal:
- Go to the Start Training tab.
- Select the user from the list, then select the desired protocol from the protocol list.
- Once loaded, the user must read the tips and instructions to prepare for the training.
- Connect the headphones to your system.
- Set the volume to a comfortable level by adjusting the volume from the system’s volume.
- Once all set, click Start Training to proceed.
- Enjoy as the training session begins!
- You can pause, resume, or stop the training anytime—or let it end automatically when complete.
- After the session, you’re prompted to rate the session and leave comments (optional but useful for reporting and analytics).
- The training data will be uploaded to the cloud automatically.
Note: If you’re prompted that the selected protocol requires the NovaMynd device, this indicates it’s a Smartpath EEG Training Protocol, which is currently supported only on the app, not on the portal.
2. Via the App:
Click here to learn how to start training using the NovaMynd mobile app.
Remote Access (NovaMynd Personal Access)
By enabling NovaMynd Personal Access, users can train independently at any time, from anywhere.
This option grants access to both the NovaMynd portal and mobile app, making it ideal for remote training or hybrid workflows.
Click here to learn how to enable this feature.
Automatic Logging & Monitoring
Every training session is automatically tracked, with optional session ratings and user feedback. This provides you with real-time visibility into user activity and protocol engagement.
-
Click on the Statistics tab to get an overview of activity per user and protocol.
-
For detailed insights, click on a user’s name to access their profile, then go to Access Training > Training Reports. Click here for more details.
These insights help you evaluate effectiveness, monitor trends, and fine-tune protocols to achieve better training outcomes.
NovaMynd Portal - Start Training (In-Person)

NovaMynd App - Start Training (Remote)
6
Routines & Reminders
Think of a routine like a personalized prescription—it’s made up of one or more components called elements. Each routine is given a clear title for easy identification. Every element includes a description, recommended start time, duration, selected days, and is linked to a specific training protocol.
Once created, routines can be assigned to individual users and fully customized to match their schedules and goals. Users receive timely reminders before each routine is due, helping them stay on track with their training.
Routine performance is automatically tracked, providing valuable insights into engagement, consistency, and outcomes—all accessible through the NovaMynd portal.
Creating a Routine
To create a routine:
- Go to the Routines tab
- Click Create Routine
- Name the routine, add as many elements as needed, and set the scheduling settings—including duration, time, selected days, and the associated training protocol
Once created, a routine can be scheduled and assigned to a specific user. The original routine stays intact, serving as a reusable template that can be tailored to meet individual needs.
You can update or delete a routine and its elements at any time by selecting Manage on the Routines tab.
Assigning a Routine
To assign a routine:
- Go to the Routines tab
- Click Manage on the routine you want to assign
- Select Assign Routine
All routine elements are selected by default, with settings pre-filled from the original routine. You can customize these settings before assigning:
- Deselect elements you don’t wish to include
- Adjust the recommended time, duration, or selected days
Note: These changes apply only to the assigned version for the specific user. The original routine remains unchanged.
After assignment, the user receives a confirmation email. As long as the routine is active, they’ll get a timely push notification about 10 minutes before any scheduled routine element is due (based on the user’s timezone, or UTC if not set). Notifications include the routine’s title and the relevant element’s description to keep users aligned with their training goals.
Note: Push notifications are sent only to users who access NovaMynd through Personal Access.
Managing Assigned Routines
To manage any assigned routine:
- Navigate to the Routines tab
- Click the Assigned Routines tab
From here, you can:
- View all active routines (or filter by status, user, or routine name)
- Search routines using keywords
Click Manage on any routine to:
- Edit its settings
(Note: While you cannot remove elements, you can deactivate them) - Delete the routine and its elements
- Activate/Deactivate all routine elements at once
To modify individual elements, use the Edit option.
Note: Users receive an email notification for any changes made to their assigned routines.
Monitoring Routines
To monitor a routine:
- Go to the Routines tab
- Click the Assigned Routines tab
Here you can:
- View all active routines (adjust filters to view others)
- Expand each entry to see detailed schedules and notifications
- Click Statistics to access insights
The Statistics page provides comprehensive analytics on both entire routines and individual elements, helping you assess user engagement, consistency, and overall compliance over time.
7
Community & Training Classes
NovaMynd lets you organize users into community groups, making it easier to manage shared training protocols, communication, and group sessions.
Communities simplify your workflow by allowing you to assign training protocols to multiple users at once. Just create a group, add members, and link the protocol—no need for individual assignments.
Take it further with real-time training classes. Within each community, you can host synchronized sessions using NovaMynd’s class feature—offering a fully coordinated experience that’s perfect for live group engagement and guided training.
Creating a Community
To create a community:
- Navigate to the Community tab
- Click Create Community
- Enter a name for the community
Once created, your community will appear in the list under the Community tab, where you can manage all existing groups.
Managing a Community
Click Manage next to any community to:
- Add or remove users as community members
- Link training protocols to the group
- Create and manage training classes
- Send messages to all members
Clicking Message allows you to send an email to every member of the selected community—ideal for announcements or updates.
All protocols linked to a community are automatically shared with its members. You can update these associations at any time—adding or removing users, unlinking protocols, or deleting the community if it’s no longer needed.
Training Classes
Training classes are scheduled group sessions that can be delivered both in person and remotely, as long as each participant has access to NovaMynd Personal. They’re built within a community group and help facilitate structured, collaborative learning experiences.
To create a class:
- Go to the Community tab
- Select an existing community (or create one) that has at least one member and one linked training protocol
- Scroll to the Training Classes section
- Click Start Class
Enter a class name and choose the training protocol. After creation, you’ll be directed to the class overview page.
From the overview page, you can:
- Notify members about the upcoming class
- Track enrollments in real-time
- Start the class once at least one member has enrolled
- Pause, resume, or end the session as needed
Once a class has started, new participants can no longer join. All enrolled users will receive real-time updates throughout the session, ensuring a seamless group training experience.
Note: Training class notifications are only sent to users who have access to NovaMynd Personal.
8
Other features
Other features you can access on the NovaMynd portal include:
Memberships
From the Memberships tab, you can manage your subscription. Memberships can be cancelled at any time. When you subscribe, your membership will be set to auto-renew based on your selected plan. Simply follow the on-screen instructions to choose and manage your plan.
Store
The Store tab gives you access to your credit balance. You can top up your credit at any time by clicking Top up Credit and following the prompts. This section also includes additional services and tools available for purchase to enhance your NovaMynd experience.
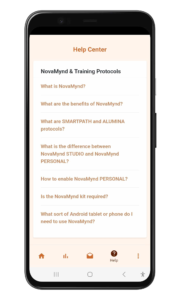
Help & Support
In the Help tab, you’ll find answers to common questions in the NovaMynd FAQs, direct access to the User Manual, and a Contact Us option. Click Contact Us to send a message to our support team whenever you need assistance.
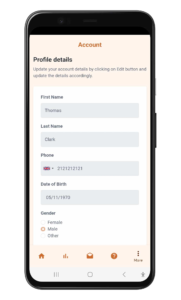
Account
Under the Account tab, you can manage your personal details and set up your NovaMynd profile. The profile information will be visible to your users and the NovaMynd Community—make sure it reflects your expertise and interests accurately.
1
Downloading the NovaMynd app
The NovaMynd app is currently available only on the Android platform for Studio Access. Use the following link to download it from Play Store (Android).
Note:
The Android app supports both Studio Access and Personal Access.
The iOS app currently supports Personal Access only.
Once installed, open the app and log in with your credentials.
Don’t have an account yet? Click here to learn how to create one.

2
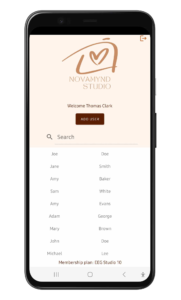
Users Management
Once you open the NovaMynd app, you’ll see a list of users assigned to or shared with your account.
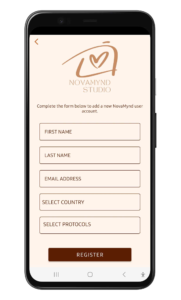
To create a new user, click the Add User button and fill out the provided form.
Please note that you must have at least one training protocol assigned to your account before creating a user. For more details on how to create a training protocol, click here.
Further user management, including updating profiles, assigning additional training protocols, and more, can be done from the NovaMynd portal.
To start a training, select a user from the list and proceed to the next section.
NovaMynd App - Users list
NovaMynd App - Add User
3
Start a Training
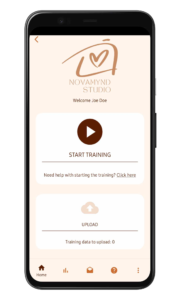
Click ‘Start Training’ to begin.
If you’ve been assigned multiple protocols, you’ll be prompted to select one before starting your session.
-
If you’ve selected a Smartpath EEG Training Protocol (requires the NovaMynd device), please follow the steps in the Smartpath EEG Training Protocol section below.
-
If not, refer to the Smartpath Training Protocol section for non-EEG instructions.
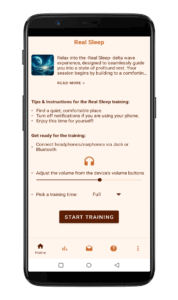
Smartpath Training Protocol
Having already selected a user and the protocol as per the previous section, follow these steps:
- The user must read the tips and instructions to prepare for the training
- Connect the headphones to your Android device using either Bluetooth or the headphone socket. This is required depending on the selected protocol settings.
- Set the volume to a comfortable level, with a minimum of 30% volume required.
- Once all set, click Start Training to proceed.
- Enjoy as the training session begins!
- You can pause, resume, or stop the training anytime—or let it end automatically when complete.
- After the session, you’re prompted to rate the session and leave comments (optional but useful for reporting and analytics).
- The training data will be uploaded to the cloud automatically, or by clicking the Upload button.
- You can access the training report from the Reports tab while the user still selected.
To start another training session for the same user, you can repeat the steps above. If you want to switch users, click the back arrow (<) icon in the top left corner to return to the users list.
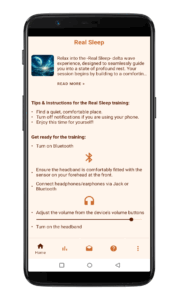
Smartpath EEG Training Protocol
Having already selected a user and the protocol as per the previous section, and with the NovaMynd device assembled and paired, follow these steps:
- Enable Bluetooth on your Android device.
- The user must read the tips and instructions to prepare for the training
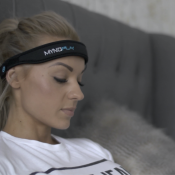
- The user must wear the headband/cap. Ensure the headband/cap is comfortably fitted and that the sensor has good contact with the skin.
- Connect the headphones to your Android device using either Bluetooth or the headphone socket. This is required depending on the selected protocol settings.
- Set the volume to a comfortable level, with a minimum of 30% volume required.
- Turn on the headband.
- Once all set, click Start Training to proceed.
- If prompted with a Pair popup, click ‘Pair.’
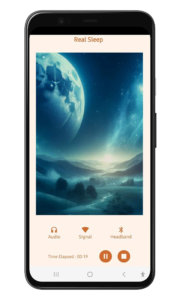
- Enjoy as the training session begins!
- You can pause, resume, or stop the training anytime—or let it end automatically when complete.
- After the session, you’re prompted to rate the session and leave comments (optional but useful for reporting and analytics).
- The training data will be uploaded to the cloud automatically, or by clicking the Upload button.
- You can access the training report from the Reports tab while the user still selected.
During the training, it’s important to keep the device and the app in close proximity to each other to prevent disconnections. Ensure that the app remains open throughout the session so you can monitor the training progress and receive immediate alerts for issues like device bad signal and disconnection.
To start another training session for the same user, you can repeat the steps above. If you want to switch users, click the back arrow (<) icon in the top left corner to return to the users list.
NovaMynd App - User selected
NovaMynd App - Set up training
NovaMynd App - Training started
4
Set up the NovaMynd device
This step is required for Smartpath EEG Training Protocols.
The NovaMynd device is a user-friendly and comfortable brainwave headset equipped with a single dry sensor electrode. It captures electrical signals from your brain and transmits them, along with your focus, relaxation and other brainwave data, via Bluetooth to the NovaMynd app.
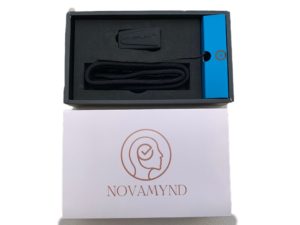
The NovaMynd kit includes:
- Bluetooth unit
- Headband
- Sensor cable
- USB charging cable
Charging the device
Please ensure the Bluetooth unit receives a minimum 4-hour charge before initial use.
Use only the provided custom charger cable to charge the device; any other cable may cause hardware damage.
While charging, a solid red LED is displayed. Once the battery is sufficiently charged, the red light will turn off.
Low battery is indicated by an intermittent green flash during use.
Powering the device on/off
Powering On: Press and hold the power button for approximately 5 seconds until the blue LED flashes rapidly.
Powering Off: Press and hold the power button for approximately 5 seconds.
Assembling the device
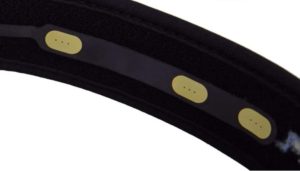
The headband features two gaps on the left side: one for passing the Bluetooth unit through and another for the sensor cable.
Begin by placing the sensor at the front of the band and threading its cable through the first gap. Then, connect the Bluetooth unit through the other gap and attach the sensor cable to the Bluetooth unit. The Bluetooth unit should sit above the left ear.
Ensure the sensor rests approximately 1 inch above your left eyebrow, on the left side of your forehead.
If you’ve acquired the NovaMynd cap, follow the same steps, substituting the headband with the cap to connect the Bluetooth unit and sensor.
When wearing the headband or cap, adjust it using the Velcro to ensure a comfortable fit. Also, make sure to move any hair away from the sensor and ensure the sensor maintains good contact with the skin.
For a visual guide on assembling the headband, click here. For the cap, click here.
Pairing the device
Pairing is necessary only the first time you use the device, but if you switch to a different Android device, you’ll need to pair it again.
Follow these steps to pair:
- Navigate to the Settings menu on your Android device,
- Select Bluetooth,
- Activate Bluetooth.
- Next, power on the headband unit.
- Once the headband unit’s blue light is flashing (indicating it’s discoverable), it will appear as ‘MyndBand’ in the Bluetooth network list on your Android device.
- Select ‘MyndBand’ to initiate pairing and then follow the on-screen instructions to complete the process.
NovaMynd Kit
NovaMynd headband
NovaMynd sensor
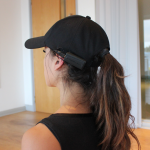
NovaMynd cap
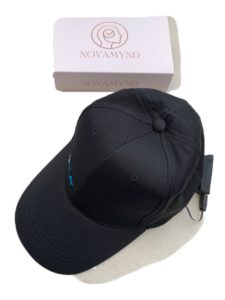
NovaMynd cap
5
Other features
Other features you can access on the NovaMynd app include:
Reports
Reports Tab: You can access the selected user’s training data and progress. To view a different training protocol in the report, simply choose another option from the dropdown at the top of the screen. Additional charts are available for Smartpath EEG Training protocols.
Support
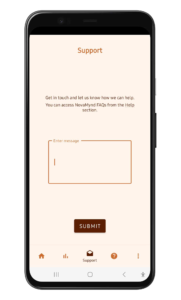
Support Tab: You can reach out to us via the Support tab—we’ll respond as soon as possible.
Help
Help Tab: You can access the FAQs on NovaMynd.
Account
Account Tab: You can manage your account details by accessing the ‘More’ item in the main navigation and clicking on ‘Account’.
Sign Out
You can sign out from the NovaMynd app by clicking the sign out icon located in the top-right corner of the Users screen, or by accessing the ‘More’ item in the main navigation and clicking on ‘Sign out’.
NovaMynd App - Reports
NovaMynd App - Support
NovaMynd App - Help
NovaMynd App - Account
NovaMynd App - Sign Out

Log in to the NovaMynd portal using the same app credentials to access advanced features like the media library, training protocols, and user management. The portal provides a comprehensive view of your account, where you can manage training protocols, assign users, and track their progress. It also offers detailed analytics and reports for user accounts, helping you monitor performance and refine your training protocols for better outcomes.
Need further assistance? Feel free to reach out to us at info@novamynd.com.